

A step-by-step guide to setting up GOAT Flow, from registering as a merchant to taking your first payment from people and AI agents, by card or crypto. Payment links and product pages need no code.
How GOAT Flow works
GOAT Flow gives your business payment pages that both people and AI agents can use. People pay by card (Visa, Mastercard, American Express, and JCB, processed by Stripe) or in USDT or USDC on ten chains: GOAT Network, Ethereum, BNB Chain, Arbitrum, Optimism, Base, Berachain, X Layer, Metis, and Tempo. AI agents read the machine-readable files attached to each payment page and pay in crypto, from their wallet to yours.
GOAT Flow never holds your money. Crypto payments go directly to your own wallet, and GOAT Flow checks each one onchain and records it against the order. Card payments are processed by Stripe and paid out to your own Stripe account.
Setup happens in the Merchant Portal, which has two separate environments:
Mainnet, for real payments: flow-merchant.goat.network
Testnet3, for testing: flow-merchant.testnet3.goat.network
Keep the two completely separate: different credentials, different wallets, and no settings copied from test into production. The screenshots in this guide come from a demo merchant account.
The process has seven steps:
Register your merchant account
Secure the account
Add your business details and set where you get paid
Turn on card payments (optional)
Fund your fee balance
Create your payment link or products
Share your link, take your first payment, and check what agents see
Step 1: Register your merchant account
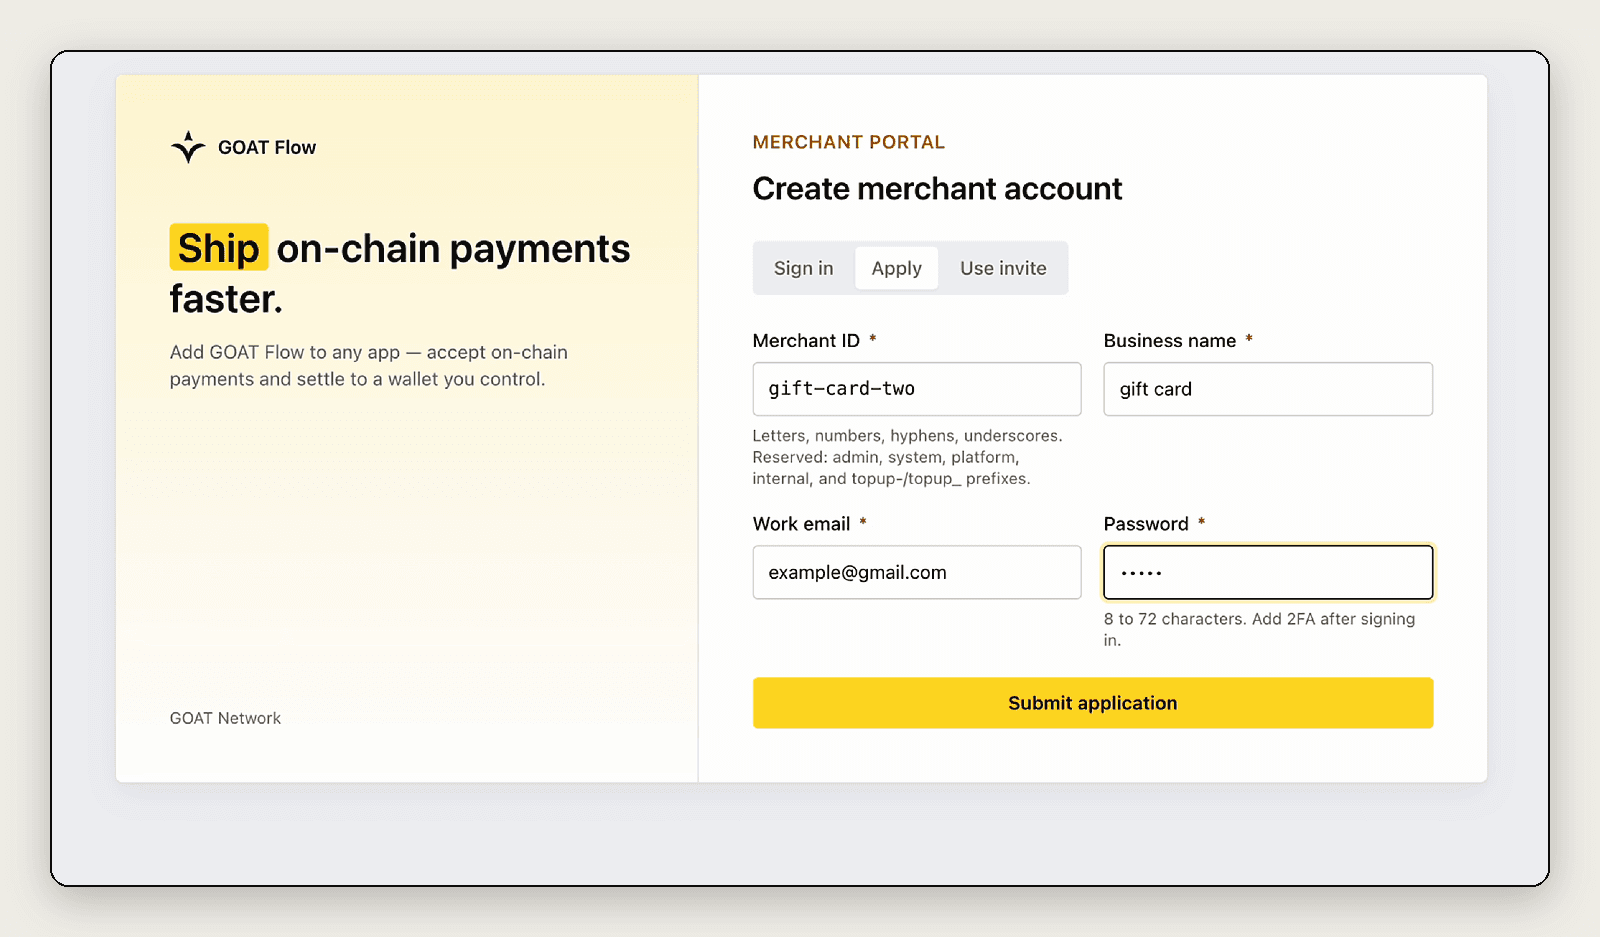
Applying takes one form: merchant ID, business name, work email, and password.
Open the Merchant Portal and choose Apply. The form asks for four things:
Merchant ID: your unique identifier, using letters, numbers, hyphens, and underscores. It cannot be changed after registration, so choose it carefully.
Business name: the name buyers see. You can change this later.
Work email: the account owner's login.
Password: 8 to 72 characters.
Submit the application. Every application is reviewed, and you can sign in once yours is approved.
Step 2: Secure the account
After you first sign in, turn on two-factor authentication with an authenticator app and store the recovery codes somewhere safe. They are your way back in if you lose the authenticator. Never share or screenshot the setup QR code or the recovery codes. If you lose both your password and your authenticator, email contact@goat.network.
Step 3: Add your business details and set where you get paid
Setup runs through the portal's Payment Guide, which has three stages: business details, payment methods, and how customers pay.

Your business name and store description appear on your payment pages and on receipts.
Start with your business name and a short description of your store. Buyers see both on your hosted payment pages and on their receipts.

Choose crypto, card, or both. One payment method is enough to continue.
Next, choose your payment methods. You need at least one.
For crypto, select the tokens and networks you accept, then enter your receiving wallet address. Every payment in the tokens you selected goes straight to that wallet. This step does not need approval from GOAT.

One receiving wallet covers every token you accept.
Step 4: Turn on card payments (optional)

Create a new Stripe account or connect an existing one. The account and its Stripe Dashboard stay yours.
Card payments run through Stripe. On the Card Payments (Stripe) page, either create a new Stripe account through Stripe's own onboarding or connect one you already have. Stripe processes the payments and pays out to your connected account on its normal schedule.
The page lists three checks: your Stripe account, its status, and whether it is approved for card payments. Once all three show Ready, your payment pages offer buyers a Card option next to crypto. In your Stripe settings you can also turn on Apple Pay, Google Pay, and Link.
Card payments are charged in US dollars. A product priced at 9.99 costs USD 9.99 by card, or 9.99 USDC or USDT in crypto. Card payments carry a per-charge platform fee, which is listed on the Card Payments page.
Step 5: Fund your fee balance
GOAT Flow takes its service fees from a prepaid credit balance, kept separate from your sales. Open Top Up Fee Balance, connect a wallet, and add credit. If the balance runs out, new orders can stop, so fund it before you launch and check Fee Balance regularly.
Step 6: Create your payment link or products
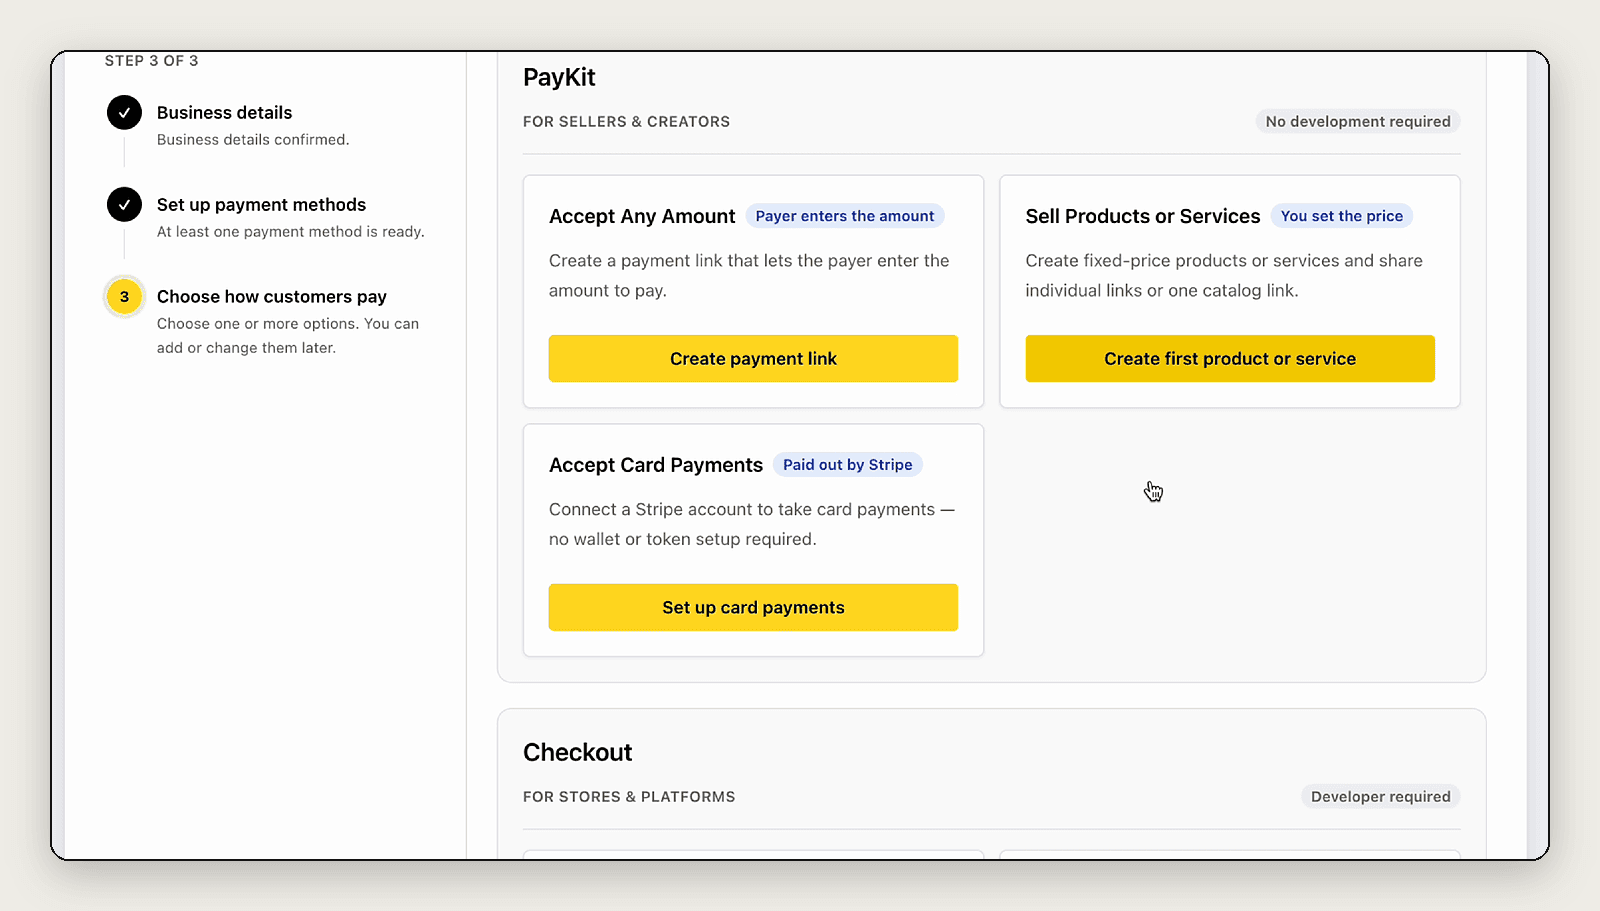
The last Payment Guide stage. PayKit options need no development; Checkout and API Payments need a developer.
The last stage of the Payment Guide asks how customers will pay. You can turn on more than one option.
The PayKit options need no development:
Accept Any Amount creates a payment link where the buyer enters the amount. It suits tips, invoices, deposits, and custom orders.
Sell Products or Services creates fixed-price products. You can share each product's own link, or one catalog link for all of them.
Accept Card Payments connects Stripe so you can take cards, with no wallet or token setup needed.
To create an any-amount link, give it a title, a message for customers, and an optional logo, then tick Crypto, Card, or both.
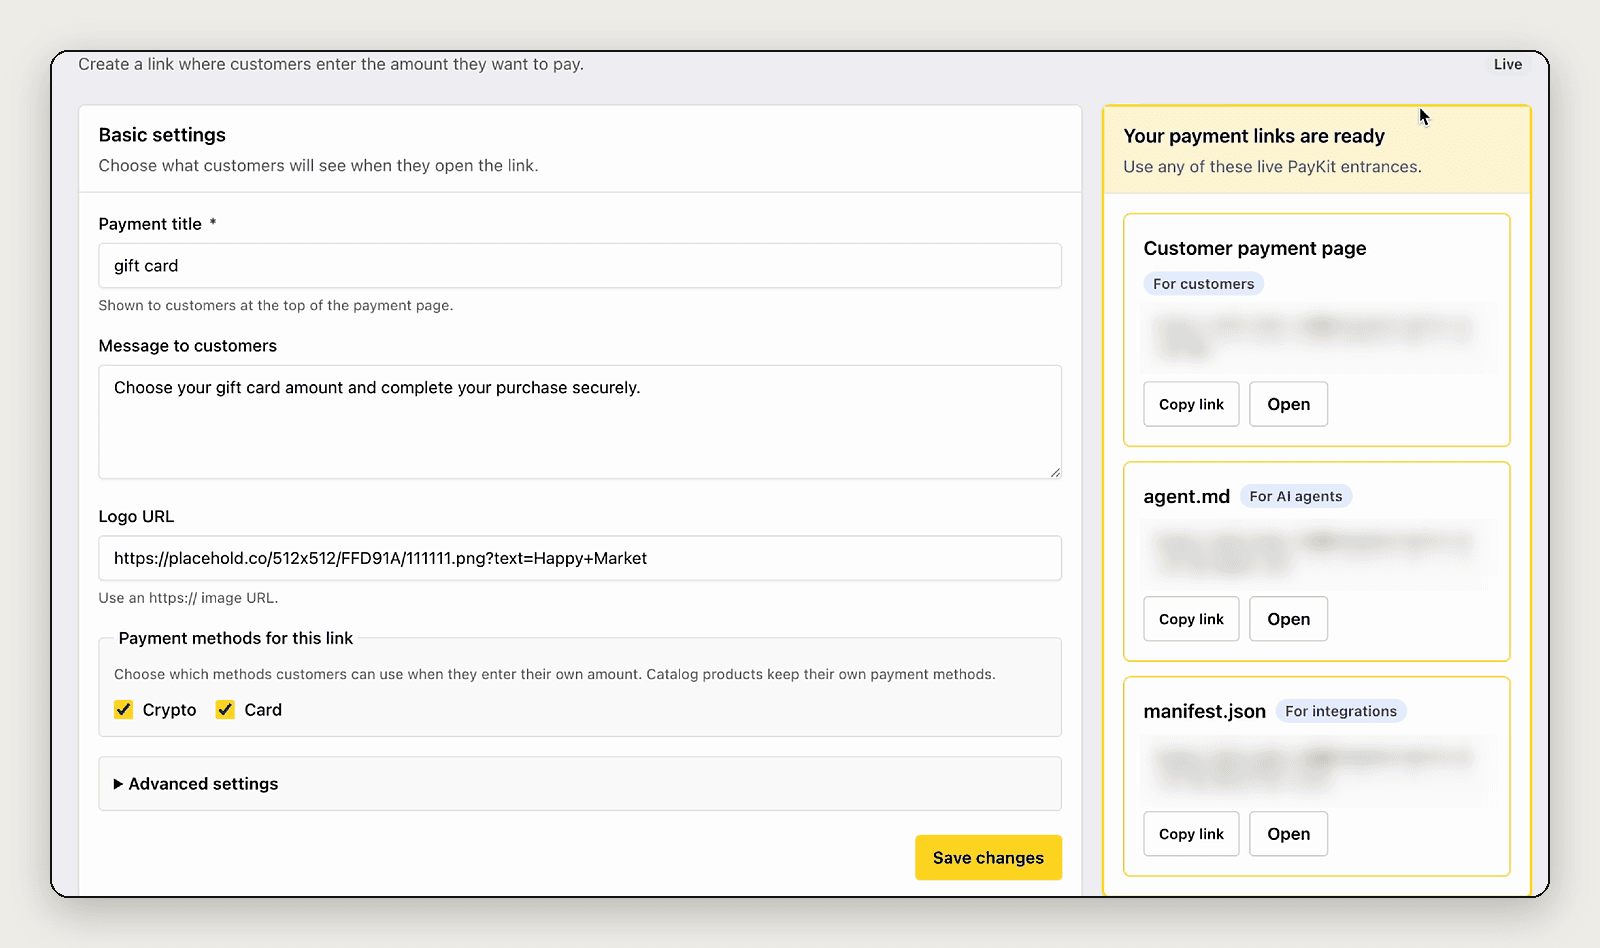
Each payment link comes with three addresses: a page for customers, agent.md for AI agents, and manifest.json for integrations.
Once the link is created, the portal shows three addresses for it:
Customer payment page: the link you share with buyers.
agent.md: a plain-language description of how to pay you, written for AI agents.
manifest.json: the same details in a structured format, for software integrations.
To sell fixed-price items instead, create a product with a name, a description, an optional image, and one price.

One price applies to every token you accept, and card payments charge the same amount in US dollars.
Each new product appears in your product list along with the payment methods it accepts.

Products go live as soon as they are created, here accepting both crypto and card.
Two further options are for businesses with a developer. Checkout suits stores and platforms: either a GOAT-hosted checkout that your site sends buyers to, or a custom integration that keeps your existing cart and order flow. API Payments lets API sellers charge per request, so agents pay each time they call a priced endpoint. Developers can start with the Flow Quick Start.
Step 7: Share your link, take your first payment, and check what agents see
Copy your customer payment page link and put it wherever your buyers already are: your website, social profiles, emails, or invoices.

What buyers see: a GOAT-hosted payment page where they choose a product and pay by card or crypto.
To test it, open the link yourself and pay. Buyers choose Crypto or Card. A crypto payment goes from the buyer's wallet straight to yours and is checked onchain against the order. A card payment is charged in US dollars through Stripe. Each order appears under All Orders; fulfil an order only once it shows as confirmed there.
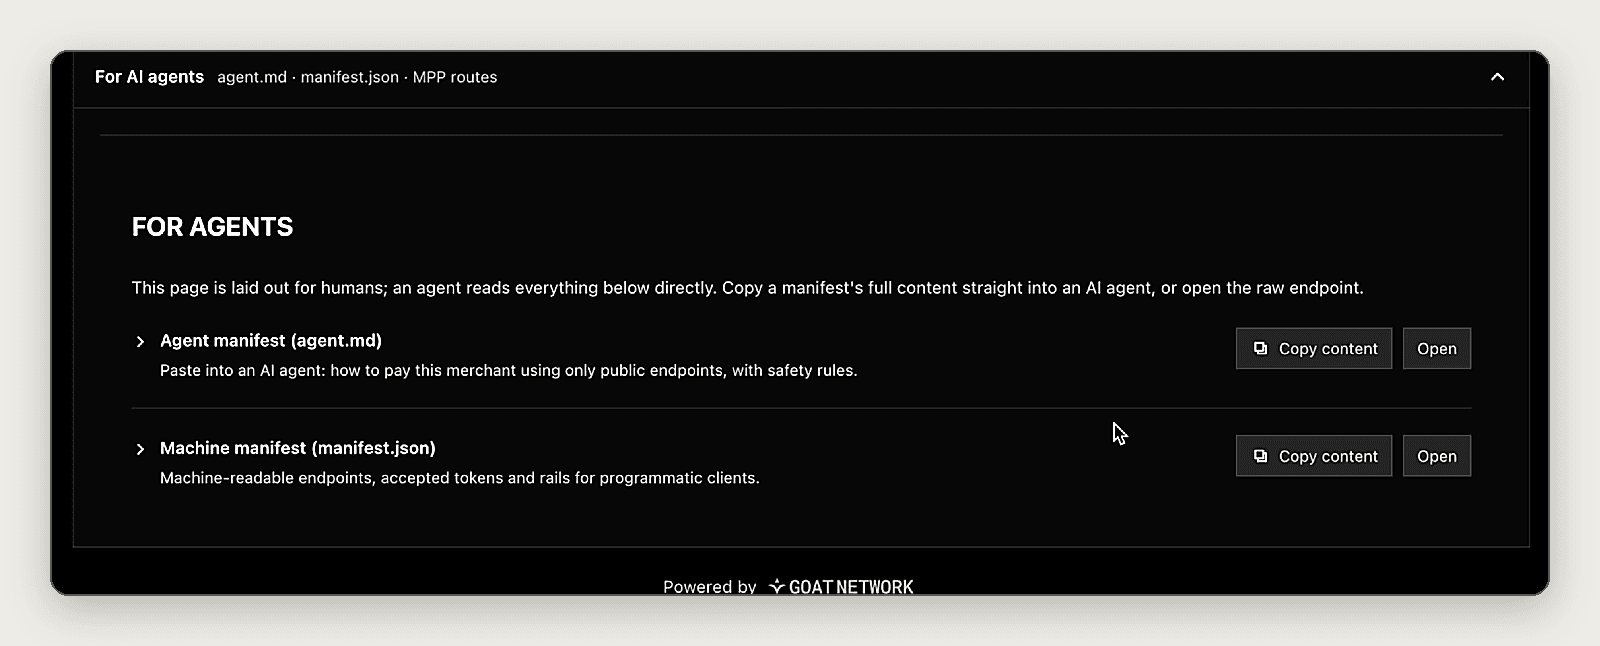
Every payment page includes a section for AI agents, with agent.md and manifest.json.
At the bottom of every payment page is a section headed For AI agents. It holds agent.md and manifest.json, which tell an AI agent what you sell and how to pay without a person explaining it. This is what makes your link usable by agents as well as people.
To see your page the way an agent does, copy the agent.md link and run this command in a terminal:
npx goatflow-quickpay inspect <your agent.md link>
It should return your business details and the ways to pay.
Test first, then go live
Before real money moves, run the whole process on Testnet3. Register a test merchant in the Testnet3 portal, set a receiving wallet, get test gas from the faucet (gas on GOAT Network is paid in BTC), and complete one purchase as a buyer. Check that the order shows as confirmed under All Orders and that the payment appears in Reconciliation with the right amount, token, and chain.
Then set everything up again on Mainnet from the start, with your production wallet and a funded fee balance, and begin selling.
Running your account day to day
The portal's Dashboard gives you an overview of activity. All Orders lists every payment with its details, Reconciliation matches payments to orders, and Refund Requests and Disputes each have their own page. To add team members, send them an invite; they join through Use invite on the sign-in page.
Learn more: GOAT Flow | Developers: Flow Quick Start | Help: contact@goat.network

